
Basic Sourdough Bread
Awn Kitchen Method
SOURDOUGH
1/8/20253 min read
To make bread you need to turn your starter into ‘sponge’ which is a more active version of the starter. To do this, you essentially perform one aggressive feed. At this step, you have to multiply the amount of sponge you make to suit the number of loaves you are making.
You will use all of your starter at this point but will remove some to keep after this step.
Sponge
(1 loaf)
175g water
175g flour
Use the same amount of starter for multiple loaves, just multiply the flour and water here.
After adding flour and water to a large jar or bowl, leave it on the counter for 1-4 hours until it passes the float test.
Float test
Drop a spoonful of the sponge into a glass of room temperature water. If it willingly floats at the top and holds its shape, it’s ready.
It can fail this test for two reasons. If you haven’t waited long enough it would sink immediately. If it floats then sinks you probably waited too long.
When the sponge is ready you can then make the dough. The recipe will not call for all of the sponge in the jar. The remaining sponge will turn back into starter as time passes and it becomes less active. Return this portion back to the fridge to keep.
Dough
(1 loaf)
200g water
340g sponge
340g flour
You can work with different ratios of whole wheat and rye flours but all purpose works fine.
Gently break up the sponge in the water, then add the flour. Use your hand like a claw (or utensil) and completely combine. It will not be smooth at this step. Rest for 20 minutes.
The next step is adding salt. It’s done as it’s separate step to improve the final texture of the bread.
Autolyse
(1 loaf)
10g water
10g salt
Dump the salt onto the middle of the bread and then pour the water on top. Use your hand like a claw again and mimic a stand mixer to twist the salt into the dough 6-8 times.
Pull the edge of dough up and fold over once or twice. Flip the dough if you can. Cover with a beeswax wrap or plastic wrap to prevent the surface from drying. Rest for 30 minutes.
Developing Gluten
This bread doesn’t require kneading like traditional white bread. It’s important to be gentle and patient in this step. This step will take 2-3 hours.
Grab the dough with one hand and stretch then fold it over itself. Go around the bowl once (6-8 motions) Don’t be tempted to keep going to ‘even it out’. Rest for 30 minutes.
Repeat this process 3-4 times.
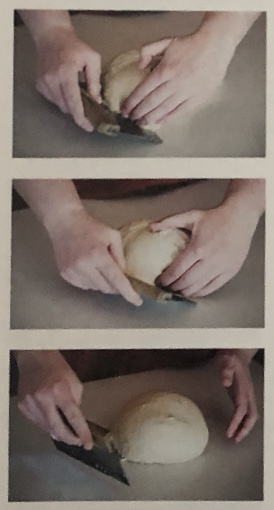
Pre-shape
Dump the dough onto a clean surface. Tuck the dough under itself (4-8 times) until the surface is tight and round. The pictures use a bench scraper tool but it isn’t necessary. Rest for 10-20 minutes.
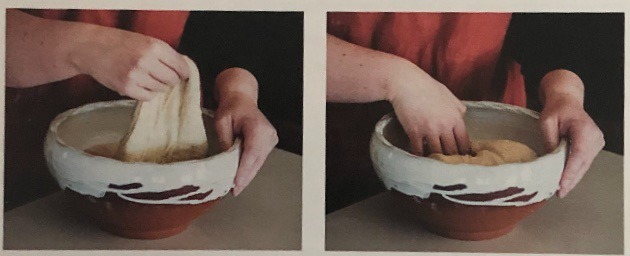
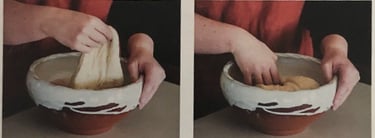
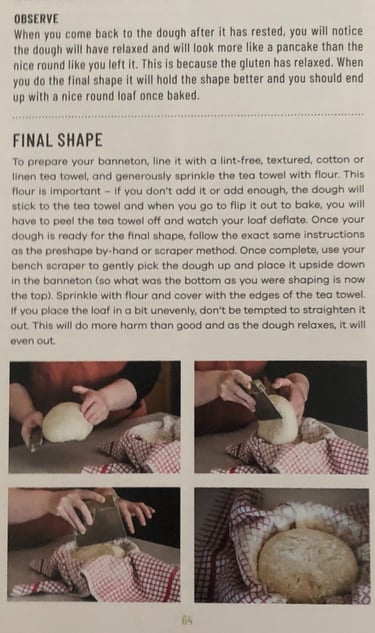
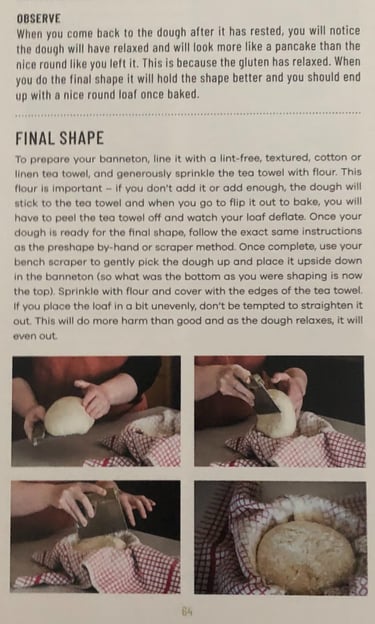
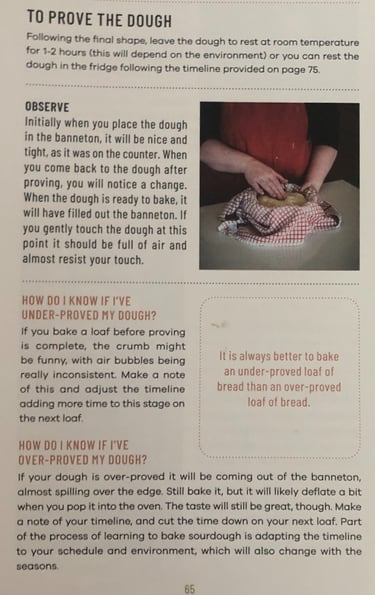
Final Shape / Prove
If you don’t have a banneton, just use a medium sized bowl.
The next pictures are pages directly out of the book.

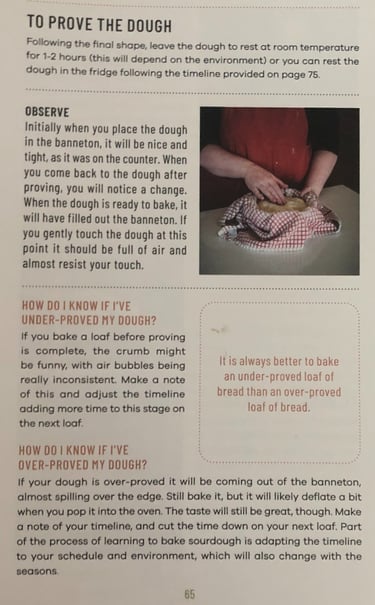
Baking
I bake mine in a Dutch oven from cold. When dough has finished proving, I dump it onto a sheet of parchment, score it and then lower it into the pot. I bake with the lid on for about 30 minutess and then lid off for about 20.
You can bake from a cold oven or a hot oven. I haven’t found any differences.
Look on Google for methods without a Dutch oven if necessary.
Set the oven to 500f (I use 450f or 475f because my oven scares me)
Make sure to score the dough deeply so that it can rise fully. Use a sharp knife and Google inspiration for pretty loaves.
Bake until the top is a dark golden brown. It will take anywhere from 30-60 minutes usually. You can also aim for an internal temperature of 208f.
Prodaniuk Recipes
By Erin :)
© 2024. All rights reserved.